
Summary:
- In addition to offering powerful features, Divi is approachable and user-friendly, thanks to its built-in visualizer that lets you see your changes in real-time and removes the need to code. This makes it one of WordPress’s best plugins and a useful web design tool for people at all experience levels.
- Divi uses a colour-coding system to organize different types of content. Blue sections hold large groups of elements, while green rows are specific to individual content blocks and grey modules contain the content itself (like text, images, or buttons).
- Whenever you add a new module, you’ll see three tabs: Content, Design, and Advanced. The first two are for what you’re putting in and how it displays, whereas the last gives you the opportunity to incorporate scripts and other more technical flourishes.
- To save your progress with a Divi design, click the three buttons in the middle of the screen and then press the green “Save” button—there’s no autosave feature here!
- For more help building a site in Divi, contact Monochrome Marketing. We’ve built countless gorgeous WordPress sites with this unique plugin and will be happy to help you create the website you’ve always wanted.
Out of all the themes WordPress offers to help you customize your website, Divi is perhaps the most powerful—not just because of the wealth of features it offers, but because it’s intuitive and approachable as well. Divi’s balance between user-friendliness and functionality makes it a potent tool in any web developer’s toolkit, once you know your way around it. Fortunately, we’re here to give you the five-cent tour.
Divi is one of our favourite tools here at Monochrome. It’s allowed us to create gorgeous WordPress websites for an incredibly diverse range of clients, so we know a thing or two about how to make the most of it. Below, we’ll tell you a bit more about what makes Divi so valuable, then dive into an overview of its key features and how to use them.
What Makes Divi Great
Calling Divi a WordPress theme actually feels a bit unfair, because Divi offers so much more. Think of it like the Canva of web design tools: it’s heavy on visuals, uses a drag-and-drop-style interface, and gives you near-total control over how you customize a site.
The team behind Divi markets it as a “complete design framework”—which seems pretty accurate to us. As a full-service digital marketing agency, we’re always on the lookout for tools that let us deliver eye-popping results to our clients efficiently, and Divi definitely delivers.
Here are a few things that make Divi special:
- It’s simple: you don’t need coding experience to build beautiful websites with Divi. Its built-in visualizer lets you see the effects of your work in real-time.
- It’s versatile: Divi is easy to use, but nearly unlimited in terms of what you can do with it. In fact, the Divi builder plugin can be used separately with any other WordPress theme to provide even more design options.
- It’s fun: Divi turns the experience of building a website into something like assembling a vision board in your living room. It’s designed to take a task most people see as technical and make it feel hands-on. Don’t worry, though—if you prefer a more traditional experience, Divi has a backend builder as well!
Of course, you’ll need to know where Divi’s features are before you can start using them. Below, we’ve put together a quick guide for finding the most important ones.
How to Navigate to the Divi Editor
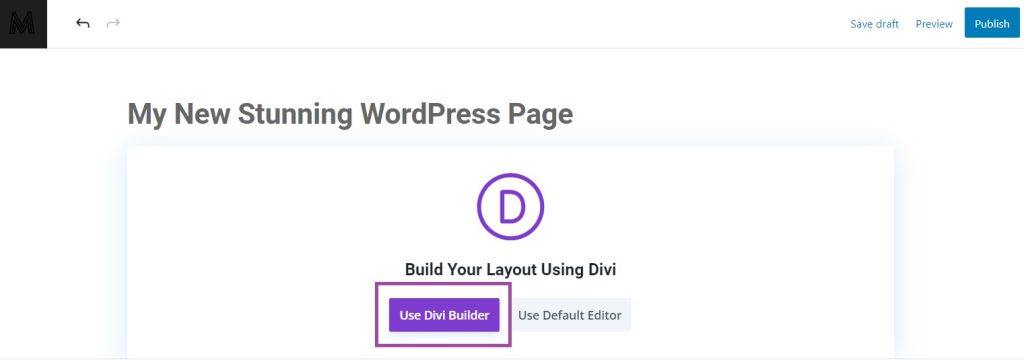
The first step to creating stunning web pages with Divi is opening up the Divi editor. Start by creating a new WordPress page. Once inside your new page, click on the “Use Divi Builder” button. This will take you to the Divi editor where you can select the “Start building” option and get started!
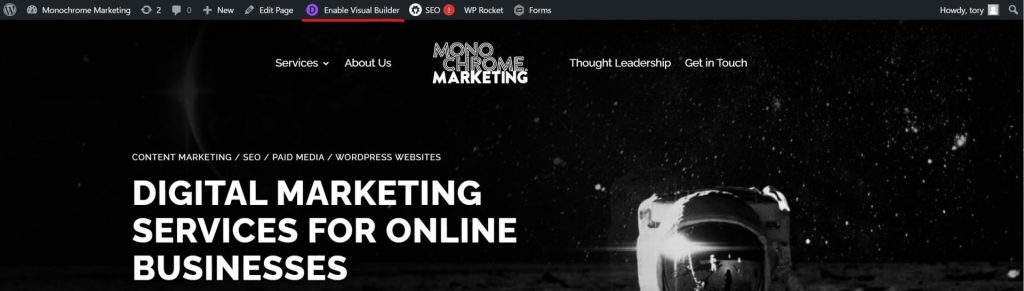
If you are trying to edit a page that already exists, simply navigate to that page as you normally would, and then click on the “Enable Visual Builder” button in your top toolbar.
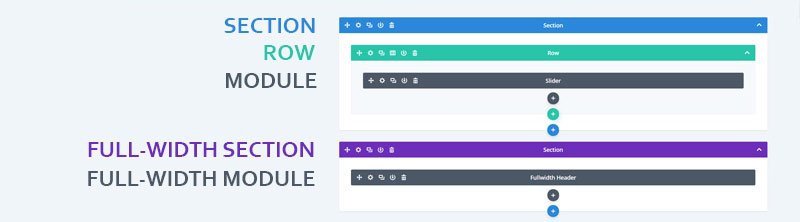
Understanding Divi’s Colour Codes & Elements
Divi uses a colour-coding system to help you organize different kinds of content. These fall into three main categories: blue, green, and grey. Because Divi takes a modular approach to arranging elements, It’s helpful to think of these categories as different container types—like tupperware, or Russian nesting dolls.
Blue: Sections
Sections hold large groups of content. They’re also used to set the parameters of your site—for example, you can use them to specify the maximum width that you want the site to be so elements like background designs and photos don’t get stretched out on larger desktop screens.
When you’re adding sections to a site, you’ll see them as blue-tinted boxes. You’ll also be able to control the spacing between these sections so things stay visually consistent for users across different devices.
Green: Rows
Rows often hold the actual content in a site, and can be used to designate how many columns each section contains. Here at Mono, we often use about two columns per row within each section. Here’s what that looks like:
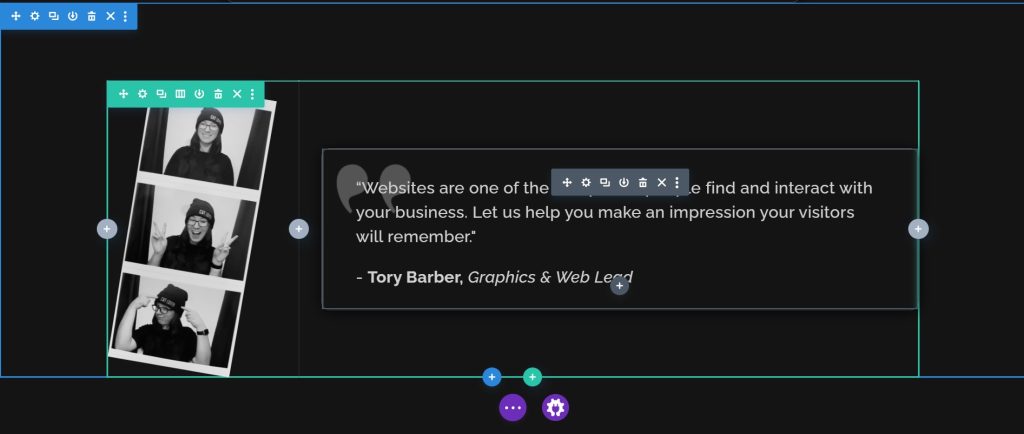
Rows have a green tint in Divi’s visual builder, which makes it easy to differentiate between them and sections when you’re building a complex layout. Now, let’s talk about the actual types of content (called modules) Divi lets you put into your site.
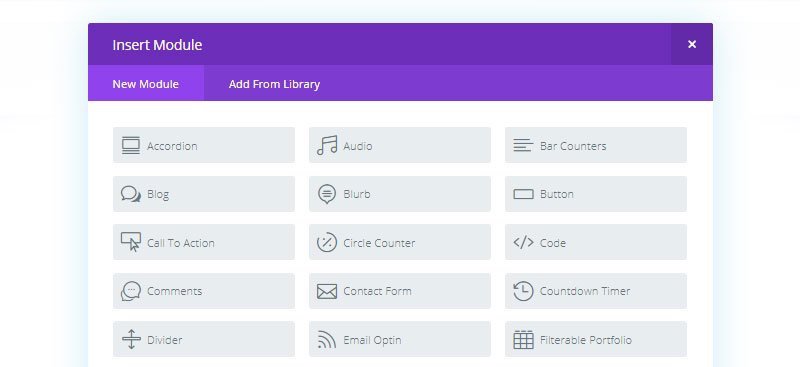
Grey: Modules
Modules—coloured gray—are the actual types of content Divi lets you add to your site. There’s a massive amount of different modules you can add, but we’ll stick to a few of the most common here:
- Text: pretty self-explanatory—this is what you add when you want to type words and have people read them.
- Image: there are lots of ways to customize images within Divi: you can add animations, overlap images to create stacking effects, and more. We won’t get into all that here, but stay tuned for detailed coverage on how to make the most of specific Divi features.
- Button: commonly used to create CTAs—”Learn More”, “Buy Now”, “Contact Us”, etc.
- Blurb: simple-but-powerful groupings with a text, image, and content block. You get to customize the colours, placement, icons, and more.
- Blog Module: this is where you can create carousels for things like blog posts. What’s great about this feature is that it automatically pulls the correct feature image, title, and metadata from the content you’re using it to display. Just be advised that the blog module always displays content in a three-column layout and wraps around to the next column if you have a number not divisible by three (i.e. a blog with four posts will show two in the leftmost column and one in each of the others).
Putting Your Content in Divi
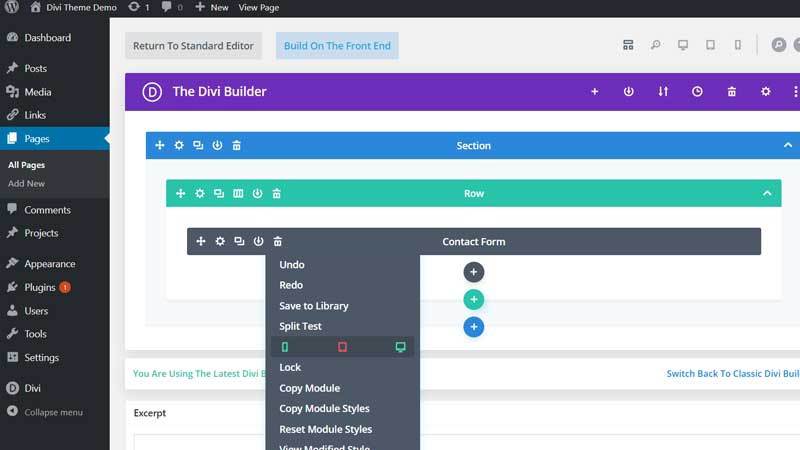
Now that you know how to organize your content within Divi, let’s talk about how to actually put it in. When you add a new module, a floating menu will pop up. Choosing “Settings” (the gear icon) will bring up a slightly different interface depending on the type of module you’ve selected, but you’ll normally see the following three tabs:
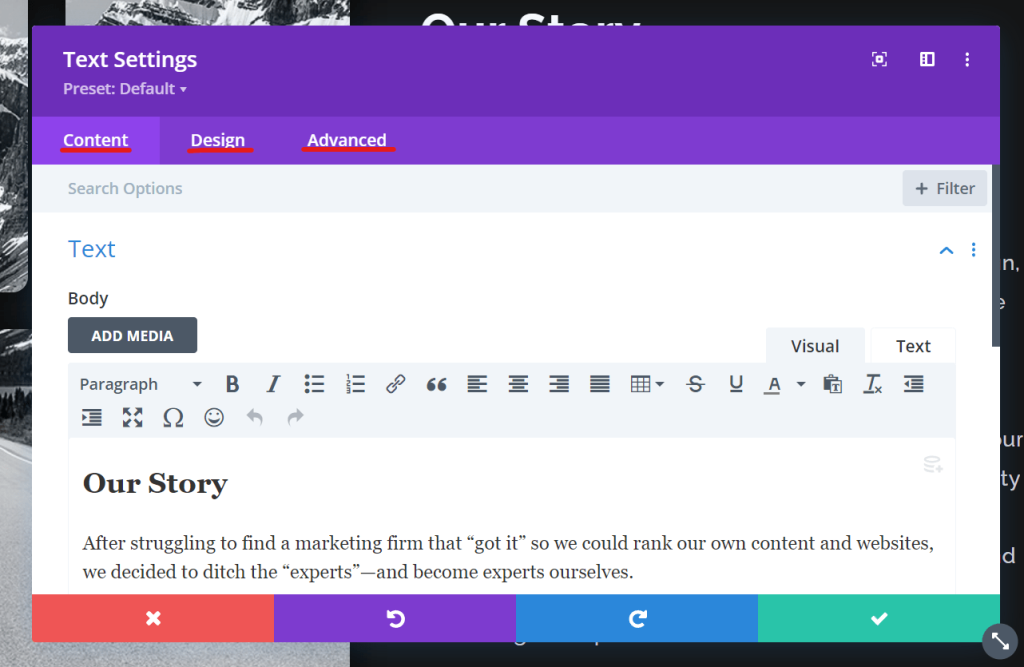
Content
This is where you choose what you’ll be showing: text, images, backgrounds, etc. You put in the stuff you want people to see—it’s pretty straightforward.
Design
This is where you customize the way your content is presented. You can alter your fonts, spacing, sizing, borders, and more—even adding things like box shadows and animations.
Advanced
This is where those of you who are a little more technically-inclined can manipulate things like CSS scripts, classes, and IDs. Divi’s designed so that you’ll almost never need to go here—but it also gives you the option.
Saving Your Changes & Making Them Live
Pay attention, because this part’s really important: Divi lets you see the changes you’re making in real time, but it doesn’t save your work as you go. To save your progress, you’ll need to click the icon in the middle of the screen with the three dots on it:
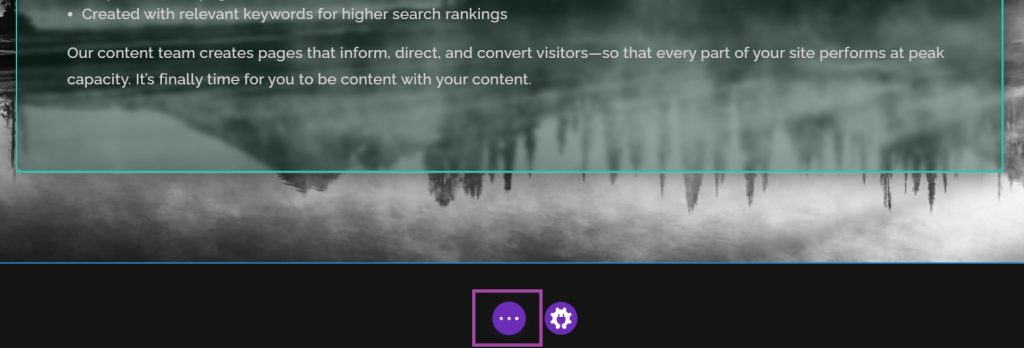
Once you do, navigate to the green “Save” button in the bottom right and click it. If you don’t, nothing you’ve done will get pushed to the live site.
You’ll also notice that this three-dot menu contains options for changing the way you view your site—you can see how it will show up on a desktop, a tablet, or a mobile device (which makes it easier to design for each type of user experience). Divi automatically figures out what kind of device a given user is accessing your site with based on their screen width and selects an interface to match it based on your Settings inputs, but it’s helpful to know what they’ll be looking at as a way of checking your work.
Kickstart Your Divi Design
Use what you’ve learned here to start your Divi design adventure! The information above should give you everything you need to get started. Just remember: while Divi is easy to learn, it offers a ton of freedom, which sometimes makes it tempting to bite off more than you can chew comfortably.
Browse our other posts to get more comfortable with the finer points of digital design and marketing so you create with confidence. And if you find yourself falling down a Divi rabbit hole and need help building your dream website more efficiently, contact our team! Building kickass WordPress sites is what we do best, and we’ll be happy to help.


